Friday, December 24, 2021

Coconut Flan

From: Sara B.

Coconut Flan (GF & DF)

For flan:
1 can evaporated coconut milk
1 can condensed coconut cream
1 tsp vanilla
5 eggs

For caramel:
1/2 cup granulated sugar (to caramelize inside flan plate)
1/4 cup water

Regular Method:
Directions:
1. Put a water bath in oven and preheat to 350.
2. In a heat-resistant pie plate (or square 8 x 8), add white sugar and water, and bring to a boil. While the water is evaporating, use pot holders to move pie plate to prevent sugar from burning. Keep boiling until as much water as possible boils off, and continue to move to prevent burning. Once it reaches a light auburn color, remove from heat and coat the sides of the pie plate. 
3. While the caramel is cooling, add all the flan ingredient to the blender and blend.  
4. After sugar/caramel pie plate cools, add the ingredients from the blender to the cooled pie plate. 
5. Put pie plate in the water bath and bake for 45 minutes. 
6. Take out of oven and insert a knife in the middle. The flan is done when the knife comes out clean. Let cool.   
7. Chill in refrigerator preferably over night. 

Instant Pot Method:

1. In the flan plate, add white sugar and water, and bring to a boil. While the water is evaporating, use pot holders to move pie plate to prevent sugar from burning. Keep boiling until as much water as possible boils off, and continue to move to prevent burning. Once it reaches a light auburn color, remove from heat and coat the sides of the pie plate. (Caramel is very hot!)
2. While the caramel is cooling, add all the flan ingredient to the blender and blend.  
3. Pour flan mixture into pie plate and lock lid. 
4. Add 3 cups of water to Instant Pot and, using the trivet, place pie plate in Instant Pot. 
5. Manual or Pressure Cook for 14 minutes. Once the time is done, let Natural Pressure Release until pin drops. 
6. Remove pie plate from Instant Pot and let cool with lid on for 20 minutes before placing in refrigerator overnight!
7. Open lid and transfer to plate by placing upside down plate on flan plate and flipping it over. 

Tuesday, December 7, 2021

Turkey Pot Pie

Originally posted by: https://www.allrecipes.com/recipe/215447/dads-leftover-turkey-pot-pie/


Ingredients:
  • d carrots
Directions:

Step 1. 
Preheat an oven to 425 degrees F (220 degrees C). 

Step 2. 
Place the peas and carrots, green beans, and celery into a saucepan; cover with water, bring to a boil, and simmer over medium-low heat until the celery is tender, about 8 minutes. Drain the vegetables in a colander set in the sink, and set aside.

Step 3
Melt the butter in a saucepan over medium heat, and cook the onion until translucent, about 5 minutes. Stir in 2/3 cup of flour, salt, black pepper, celery seed, onion powder, and Italian seasoning; slowly whisk in the chicken broth and milk until the mixture comes to a simmer and thickens. Remove from heat; stir the cooked vegetables and turkey meat into the filling until well combined.

Step 4
Fit 2 pie crusts into the bottom of 2 9-inch pie dishes. Spoon half the filling into each pie crust, then top each pie with another crust. Pinch and roll the top and bottom crusts together at the edge of each pie to seal, and cut several small slits into the top of the pies with a sharp knife to release steam.

Step 5
Bake in the preheated oven until the crusts are golden brown and the filling is bubbly, 30 to 35 minutes. If the crusts are browning too quickly, cover the pies with aluminum foil after about 15 minutes. Cool for 10 minutes before serving.

Hot Mama Grade: A

Hot Mama Notes: This recipe was a lot of work, with making 4 subtle pie crusts from scratch. I am not sure I would make it again. Also, I definitely prefer chicken to turkey in general, and definitely for potpies. For an after Thanksgiving recipe, turkey fried rice is 1000x times easier, as are turkey nachos. That being said, the kids did like it. I was exhausted after taking 2 hours to make it after working all day. 

Wednesday, October 27, 2021

Hummus

Originally posted by: https://cookieandkate.com/best-hummus-recipe/

INGREDIENTS
1 can (15 ounces) chickpeas, rinsed and drained, or 1 ½ cups cooked chickpeas
½ teaspoon baking soda (if you’re using canned chickpeas)
¼ cup lemon juice (from 1 ½ to 2 lemons), more to taste
1 medium-to-large clove garlic, roughly chopped
½ teaspoon fine sea salt, to taste
½ cup tahini
2 to 4 tablespoons ice water, more as needed
½ teaspoon ground cumin
1 tablespoon extra-virgin olive oil
Any of the following garnishes: drizzle of olive oil or zhoug sauce, sprinkle of ground sumac or paprika, chopped fresh parsley
INSTRUCTIONS
Place the chickpeas in a medium saucepan and add the baking soda. Cover the chickpeas by several inches of water, then bring the mixture to a boil over high heat. Continue boiling, reducing heat if necessary to prevent overflow, for about 20 minutes, or until the chickpeas look bloated, their skins are falling off, and they’re quite soft. In a fine-mesh strainer, drain the chickpeas and run cool water over them for about 30 seconds. Set aside (no need to peel the chickpeas for this recipe!).
Meanwhile, in a food processor or high-powered blender, combine the lemon juice, garlic and salt. Process until the garlic is very finely chopped, then let the mixture rest so the garlic flavor can mellow, ideally 10 minutes or longer.
Add the tahini to the food processor and blend until the mixture is thick and creamy, stopping to scrape down any tahini stuck to the sides and bottom of the processor as necessary.
While running the food processor, drizzle in 2 tablespoons ice water. Scrape down the food processor, and blend until the mixture is ultra smooth, pale and creamy. (If your tahini was extra-thick to begin with, you might need to add 1 to 2 tablespoons more ice water.)
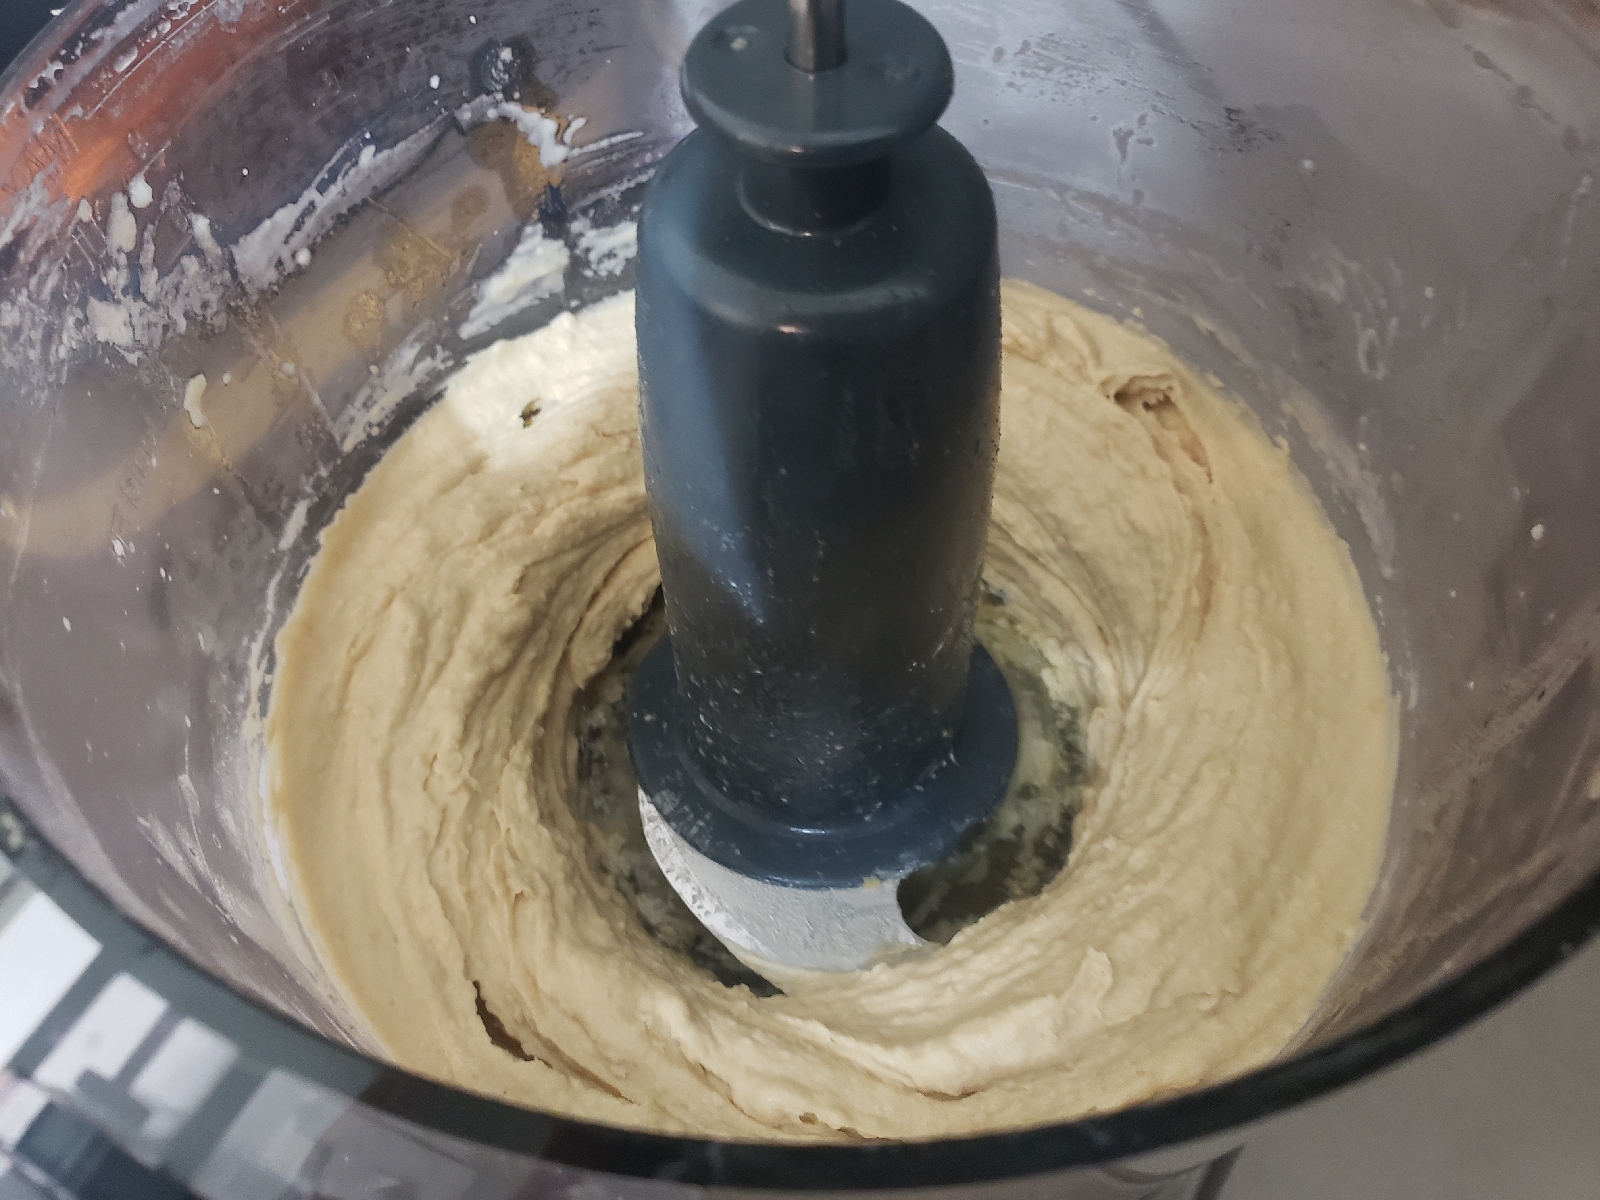
Add the cumin and the drained, over-cooked chickpeas to the food processor. While blending, drizzle in the olive oil. Blend until the mixture is super smooth, scraping down the sides of the processor as necessary, about 2 minutes. Add more ice water by the tablespoon if necessary to achieve a super creamy texture.
Taste, and adjust as necessary—I almost always add another ¼ teaspoon salt for more overall flavor and another tablespoon of lemon juice for extra zing.
Scrape the hummus into a serving bowl or platter, and use a spoon to create nice swooshes on top. Top with garnishes of your choice, and serve. Leftover hummus keeps well in the refrigerator, covered, for up to 1 week.

Hot Mama Grade:B+

Hot Mama Notes:This hummus is good. It tastes light. After being in the frig, it does get less flat. Maybe next time I will add more olive oil. 

NOTES

Recipe adapted from Michael Solomonov, via The New York Times and Bon Appetit, and Yotam Ottolenghi

HOW TO COOK DRY CHICKPEAS IN A HURRY FOR THIS RECIPE: In a large saucepan, combine 5 ounces (¾ cup) dried chickpeas and ½ teaspoon baking soda, and fill the pot with water. Bring the mixture to a boil over high heat and skim off the surface foam as needed. Continue boiling over medium-high, adding more water if you start running out, until the chickpeas are very mushy and falling apart, about 1 hour to 1 hour 15 minutes. Drain in a fine-mesh colander, rinse under cool running water, and drain well before using. Start the recipe at step 2.


Hummus Garnishes

Drizzle of olive oil

Sprinkle of ground sumac, which is gloriously sour and deep pink, or paprika, which is basically flavorless but offers a splash of color

Sesame seeds or seeded spice blend, such as dukkah

Middle Eastern hot sauce, such as zhoug or shatta

Chopped fresh pasrley


Hummus Variations

This hummus recipe is plain (and by plain, I mean delicious), but you can blend any of the following in with the chickpeas to make variations.


Green goddess hummus: 3/4 cup loosely packed fresh, leafy herbs

Kalamata olive hummus: 3/4 cup pitted Kalamata olives

Roasted garlic hummus: Cloves from 1 to 2 heads of roasted garlic

Roasted red pepper hummus: 3/4 cup roasted red peppers, drained and [ into strips

Sun-dried tomato hummus: 3/4 cup oil-packed sun-dried tomatoes, rinsed and drained (from one 6.7-ounce jar)

Toasted sesame hummus: 1/2 teaspoon in the hummus, plus 1 teaspoon drizzled on top


Use trader Joe's tahini! 

Mom's Chocolate Chio Cookies

From : Walmart Milk Chocolate Chip Package

Hot Mama Grade:A

Hot Mama Notes: These cookies are amazing! My mom add a cup or half cup of pulverized nuts (walnuts) 

Friday, October 22, 2021

White Chicken Chili

Originally posted by: https://www.cookingclassy.com/white-chicken-chili/#jump-to-recipe


Ingredients
1 small yellow onion , diced
1 tbsp olive oil
2 cloves garlic , finely minced
2 (14.5 oz) cans low-sodium chicken broth
1 (7 oz) can diced green chilies
1 1/2 tsp cumin
1/2 tsp paprika
1/2 tsp dried oregano
1/2 tsp ground coriander
1/4 tsp cayenne pepper
salt and freshly ground black pepper , to taste
1 (8 oz) pkg Neufchatel cheese (aka light cream cheese), cut into small cubes
1 1/4 cup frozen or fresh corn
2 (15 oz) cans cannellini beans
2 1/2 cups shredded cooked rotisserie or left-over chicken*
1 Tbsp fresh lime juice
2 Tbsp chopped fresh cilantro, plus more for serving
Tortilla chips or strips, monterrey jack cheese, sliced avocado for serving (optional)

Instructions:
Heat olive oil in a large pot over medium-high heat. Add onion and saute 4 minutes minutes. Add garlic and saute 30 seconds longer.
Add chicken broth, green chilies, cumin, paprika, oregano, coriander, cayenne pepper and season with salt and pepper to taste. Bring mixture just to a boil then reduce heat to medium-low and simmer 15 minutes.
Drain and rinse beans in a fine mesh strainer or colander then measure out 1 cup. Set whole beans aside, transfer 1 cup beans to a food processor along with 1/4 cup broth from soup, puree until nearly smooth**.
Add Neufchatel cheese to soup along with corn, whole beans and pureed beans and stir well. Simmer 5 - 10 minutes longer.
Stir in chicken, fresh lime juice and cilantro. Serve with Monterrey Jack cheese, more cilantro, avocado slices and tortilla chips if desired.

Hot Mama Grade: A

Hot Mama Notes: This chili is good. I might make it again. My kids liked it. I added some peas later, and they were a good addition. I used a rotisserie chicken,frozen corn, and cream cheese. 

Oatmeal Butterscotch Cookies

Originally from the back of the package.

Hot Mama Grade: B

Hot Mama Notes: I cut down the sugar to 1/2 c for both white and brown sugars. That was a good choice. These cookies were super sweet, they didn't need to be any sweeter. I used the amount of chips specified in the recipe, but if I were to make these again, I would use slightly less chips, and do half/half butterscotch and milk chocolate chips.  I didn't love these cookies, but they were okay. The kids liked them well enough. Still, I don't see a reason to make them again. 

Saturday, October 16, 2021

Chocolate Peppermint Cookies

Recipe from back of package.
Hot Mama Grade: C-

Hot Mama Notes: I was very disappointed by these cookies. I was expecting amazingness, and instead I got lackluster. One thing I didn't like about these cookies were the chunks (chips) themselves. Ick. They tasted too much like white chocolate which I don't care for at all. Secondly, I didn't bring the butter to room temperature as I should have, so I was stuck melting it on the microwave, and too much of it got melted. I think this contributed to the flatness of the cookies. Plus maybe my baking soda was old? But I don't think so. Any way, cookie FAILURE! These will not be made again, not will I buy that brand of chips again. Sigh. I feel so let down! The kids like them at least. They think I am too harsh, but really these cookies are no good. I like chocolate Peppermint Cookies, just not these!

Crock Pot Rice Pudding

Originally from: Fix it and forget it Slow Cooker Recipe Book (see image at end) 


Hot Mama Grade: D

Hot Mama Notes: This dessert was very tasty but otherwise it was a complete disaster! The rice was crunchy as it didn't cook. The mixture did not stay mixed, so it turned out more like a custard than a rice pudding. I am lucky it didn't turn out like scrambled eggs! 🙄 Next time I will make the rice pudding in a pot, the regular way so it is smooth and has the right texture and consistency! The kids did like it regardless, which makes me want to make rice pudding that is actually like rice pudding is supposed to be!! 

Italian Seasoning

Originally posted by: 
https://www.spendwithpennies.com/homemade-italian-seasoning-recipe/

Ingredients:

  • 2 tablespoons dried basil
  • 2 tablespoons dried oregano
  • 1 tablespoons dried rosemary
  • 2 tablespoons dried parsley
  • 1 tablespoon dried thyme
  • 1 tablespoon red chili flakes
  • 1 teaspoon garlic powder
Instructions:
Combine all ingredients in a small bowl.
Pour into an air tight container and store in a cool dark place for up to 6 months.

Hot Mama Grade: A 

Hot Mama Notes: Easy peasey. I hate buying spice mixes that I can make myself! 

Microwaved Beets

Originally posted by: https://www.cookinglight.com/cooking-101/how-to-microwave-beets-hack

Beets are way better fresh, and roasting beets can be a pretty involved, time-intensive process. Microwaving yields perfect, fork-tender beets in a fraction of the time as the oven.

Directions:
1. Trim off greens. 
2. Scrub beets with brush or scouring pad to remove all dirt. 
3. If the are smaller, then they can be cooked while. Otherwise, quarter up the beets. 
4. Pierce beets with knife to allow steam to release. 
5. Wrap/cover beets in parchment paper to keep moist.
6. Microwave until tender. 
7. Peel if needed. 

Hot Mama Grade: A 

Hot Mama Notes: Delicious and easy! I did not need to peel. There was almost no own and I scrubbed them well. I did cube them to cut down on cooking time because they were quite large (medium sized, really, but not small). I put them face down on the plated, and covered them with parchment paper and then the microwave cover. I cooked them 6 minutes, and then 6 more because they were still hard after the first six minutes. After 12 minutes, beet perfection!! :D

Baked Salmon in Foil

Originally posted by: https://www.wholesomerecipebox.com/lemon-garlic-butter-salmon-baked-in-foil/

Ingredients:
1.5 pounds salmon fillet
1 tablespoon olive oil
3 cloves garlic finely minced
1/2 lemon juice only
1 teaspoon Italian seasoning
1/4 teaspoon salt
black pepper to taste
2 tablespoons butter diced

 Directions:
Prep: Preheat oven to 400°.  Place a large piece of aluminum foil in a large rimmed baking dish that will comfortably hold all of your salmon (the baking dish is to catch any drippings – way easier to clean than your oven!).
Season fish: Lightly grease the foil with olive oil. Place the salmon fillets on top (they can be close together if using individual fillets, just not on top of each other). Drizzle with 1 tablespoon olive oil and evenly scatter garlic on top. Drizzle with lemon juice and sprinkle with Italian seasoning, salt and pepper. Dot with butter. Seal foil over salmon.
Bake: Bake for 10-15 minutes (depending on the thickness of your fillet or until salmon flakes easily. Serve immediately.

You can tell the fish is done when it flakes easily with a fork.

To be safe, check the internal temperature at the thickness part with an instant read thermometer – it should be 145°F to be safe.

This recipe is for pre-cut fillets here, but an entire side of salmon works great, too.

The entire side takes about 5-10 minutes longer to bake than individual fillets.

This recipe is great for those “oops” moments at 5pm: You can bake salmon from frozen!

It’s not optimal because it’s a little harder to get it done evenly, but it still works.

Simply follow the recipe, but double the baking time. 

Hot Mama Grade: A 

Hot Mama Notes: This fish was really good! Surprisingly so! I prefer my salmon grilled, but it is a hassle for me. The oven is easier. I lined a cookie sheet with foil, and then pulled another long sheet of foil to seal the fish in. I put 1T olive oil on the foil to prevent sticking. I actually ending up forgetting the butter, but I would try adding it next time. I did put an additional 1T of olive oil on the fish. I didn't have Italian seasoning, so I made some (see other recipe posted). I am sure I put way more seasoning than 1t, but it ended up being really good! Next time I would put the lemon juice (1 frozen lemon juice cube thawed) on first before the olive oil and spices. I crushed 3 large fresh cloves of garlic. I had fresh chopped basil in a refrigerated tube, so I used some of that. I put on dried oregano and thyme, plus an additional sprinkle of garlic powder. I omitted the rosemary because I didn't feel like digging through my spice cabinet looking for it, and I was too lazy to go out in the yard and get a fresh sprig! 🙄 Same with basil, I could have used fresh, but I want to use up the refrigerated paste, and it is so convenient. I sprinkled on the salt and pepper. As mentioned, I forgot the butter. I sealed up the foil packet. I baked it (1.25 lbs, thawed from the freezer, the whole side) on 400F for 25 minutes which aligned with the salmon package cooking directions. It also said to put in the meat thermometer at the thickest party and it had to be 145F. Mine was way over that, like 166F. Probably 20 minutes would have been enough, but it wasn't over done. So tasty and moist from the foil packet, and easy to clean up!

I served the fish with microwaved beets which were a HUGE hit (who knew my kids liked beets! Woo hoo!) and sliced salted cucumbers. A delicious meal that I will Definitely make again! 😁❤️

Monday, October 4, 2021

Roasted Zucchini with Parmesan

Ingredients:
Zucchini, sliced
Olive oil 
Parmesan cheese, shredded
Salt & Pepper

Instructions:
Preheat oven to 400F.
Slice zucchini and put on parchment paper. Brush both sides of the zucchini slices with olive oil. Season with salt and pepper. Put parmesan on the slices. Roast zucchini for 20 minutes. If possible, put parchment paper with zucchini directly on oven rack. Otherwise, use cookie sheet. Directly on rack results in crispier zucchini. 

Hot Mama Grade: A 

Hot Mama Notes: Simple, easy, and tasty! I prefer directly on the rack for crispier slices, otherwise they are softer. Still good though! :) 

Crock Pot 7 Layer Bars


Hot Mama Grade: D

Hot Mama Notes: I would rather eat the ingredients individually/raw than waste them in this dessert. It was a gooey half-baked mess stuck to the pot. No thanks! 

Sunday, September 19, 2021

Brisket


Hot Mama Grade: A

Hot Mama Notes: This brisket was delicious. I followed the directions. Used the meat thermometer. It took two hours more than what was listed to meet temperature. Tasty and tender. I will Definitely make it again! 

Sunday, September 5, 2021

Tiramisu

https://www.delallo.com/recipe/tiramisu/

Ingredients
6 eggs (6 yolks, 3 whites)
¼ cup granulated sugar
1 pound mascarpone cheese
6 tablespoons DeLallo Instant Espresso Coffee Powder dissolved in 1 1/2 cups of hot water
1 ½ cups of hot water
2 tablespoons spiced rum (optional)
1 (7.06-ounce) package DeLallo Savoiardi Ladyfingers (24 cookies)
1/4 cup cocoa powder

Directions
In a mixing bowl, whisk together 3 egg whites until stiff peaks form. Set aside.
In a separate mixing bowl, use a hand mixer to whisk together 6 egg yolks and the sugar until thickened and pale yellow, about 5 minutes on a medium-high speed.
Add the mascarpone to the egg yolk mixture. Whisk until smooth and combined, about 1 to 2 minutes. The mixture should be smooth and creamy, but not airy like whipped cream.
Gently fold in the egg whites. Be careful to maintain their fluffy texture.
In a shallow bowl, stir the espresso powder into the hot water. Once dissolved, add the rum. Quickly dip each ladyfinger into the coffee to wet both sides of the cookie. Do not soak.
To create the dessert, begin with a layer of ladyfingers along the base of an 8” x 8” baking dish. The number of ladyfingers needed depends on their size and the baking dish used.
Next, evenly spread 1/3 of the mascarpone mixture on top. Sprinkle with 1/3 of cocoa powder. Repeat the layering of ladyfingers, mascarpone and cocoa powder twice more.
Once finished, cover tightly with plastic wrap. Refrigerate for at least 6 hours before serving.
If you want to get fancy, finish with a layer of whipped cream piped on top and dust with more cocoa powder.

Hot Mama Grade: A

Hot Mama Notes: We very much enjoyed this dessert! And it was pretty easy to make after getting over the different ingredients (I've never used espresso powder or mascarpone cheese before). The key is to use the mixer to best the eggs and also the cheese /sugar/yolk mixture. I made my own espresso powder, but then it didn't dissolve well in the water. I think next time, I would just use espresso to dunk the cookies in. I didn't have spiced rum. so I used Golden rum. I could barely taste it. I folded the egg white into the yolk mixture by hand which worked well. I used a 13x9 with a single layer. Next time I would use a smaller, deeper pan. S mentioned loaf works well. I will definitely make this again. Delicious! 

Tuesday, August 17, 2021

North Carolina Pork


Hot Mama Grade: B-

Hot Mama Notes: This recipe is uninspiring. I tried the sauce and really it is like cooking your meat in vinegar. Surprisingly, my middle kid really liked it. I guess he likes vinegar!! Very strange. One day I will find a recipe for bbq sauce that is amazing. But not today! The sauce, while shown in the photo as regular, viscous bbq sauce, in reality is vinegar with a bit of ketchup and spices and sugar in it. I will not be making this again. I'm thankful that 1. I only made a half batch of sauce (my pork loin was only 2ish lbs), and 2. That I used the full 16 oz of chicken broth to water down the vinegar in the slow cooker. Otherwise it might have tasted even more vinegary! :/. The book lies. It makes me not want to try other recipes in it!! 

Wednesday, July 14, 2021

Crack Chicken

Original Recipe at: https://diethood.com/baked-crack-chicken-breasts/

Ingredients
▢4 slices thick cut bacon, diced
FOR THE CHICKEN
▢1 tablespoon vegetable oil
▢1 tablespoon butter
▢4 (1-pound, total) boneless, skinless chicken breasts, pounded to 1/4-inch thickness
▢salt and fresh ground pepper, to taste
▢1/2 teaspoon garlic powder
▢1/2 teaspoon smoked or sweet paprika
FOR THE RANCH CREAM CHEESE
▢4- ounces cream cheese, softened
▢1/4 teaspoon garlic powder
▢1/4 teaspoon onion powder
▢1/4 teaspoon dried dill weed
▢1/2 teaspoon dried chives
▢4 ounces shredded cheddar cheese, white or yellow - I use a little of both
FOR GARNISH
▢chopped fresh parsley
▢sliced green scallions

Instructions 

Preheat oven to 400F.
Lightly grease a 9x13 baking dish with cooking spray and set aside.
Set a large skillet over medium-high heat and add in diced bacon; cook until crispy.
Remove bacon from skillet and set aside. DON'T discard bacon fat.
Return skillet to heat and add vegetable oil to the remaining bacon fat.
Pound chicken breasts to a 1/4-inch thickness and season with salt, pepper, garlic powder, and paprika.
Add chicken breasts to the hot oil - you may have to do this in batches if skillet isn't big enough - and cook chicken breasts for 2 to 3 minutes, or until golden brown.
Flip over the chicken breasts, add butter, and continue to cook for 3 more minutes.
Remove chicken breasts from skillet and arrange in previously prepared baking dish. Set aside.
In a small bowl combine cream cheese, garlic powder, onion powder, dill weed, and chives; mix until thoroughly combined. Taste for seasonings and adjust accordingly. *You can also just stir in 1 tablespoon of store-bought ranch seasoning.
Top each chicken breast with 2 tablespoons of the cream cheese mixture. Spread to coat the surface of each chicken breast.
Take half of the bacon and add on top of the cream cheese.
Sprinkle shredded cheese over the chicken breasts.
Bake, uncovered, for 15 minutes, or until chicken is cooked through and cheese is melted and lightly browned.
Remove from oven.
Garnish with remaining bacon, fresh parsley, and scallions.

Hot Mama Grade: B+

Hot Mama Notes: This recipe is tasty if a bit salty. Mainly, I felt like I was going to have a heart attack while I ate it. It was just a little bit too much for me. Plus, nothing to do with the recipe, but I didn't start out this recipe right. I was exhausted after a long day, I didn't really feel like doing a complex recipe, and I didn't read the instructions closely enough. And then to add insult to injury (literally), I burned the first 4 or so strips of bacon, and then when I put the chicken in the pan, hot oil jumped out and burned my right ankle. :/ My fault, for certain, but it didn't put me in the right mood to enjoy the new recipe. I used 2x cream cheese as I didn't pay attention to the recipe. It is too much. Better to use 4 oz as written. I needed lower heat on the frying, and I only used bacon grease. I had a lot as I cooked the whole package of bacon. And regardless, I have bacon grease in the fridge, too. So I didn't use vegetable oil or butter. I forgot to season the chicken before I cooked which is a shame, but there is so much going on with two cheeses and bacon and ranch, I can't say that I missed it. So... I am not sure I'll make the recipe again between the unhealthy aspect and the need to make the recipe on a weekend instead of a week night. I didn't want to use the slow cooker option because it looked too mushy. 

Tuesday, June 15, 2021

Garlic Balsamic Pork Loin

Originally posted at: https://diethood.com/crock-pot-garlic-balsamic-pork-loin/

Ingredients

  • 3 pound pork loin
  • 1 teaspoon salt
  • 1 teaspoon paprika
  • ½ teaspoon onion powder
  • ¼ teaspoon fresh ground pepper
  •  cup chicken broth
  • 4 tablespoons olive oil, divided
  • 3 tablespoons balsamic vinegar
  • 5 cloves garlic, smashed
  • ½ tablespoon Italian seasoning

Instructions 

  • Pat dry pork with paper towels.
  • Combine salt, paprika, onion powder, and black pepper in a small bowl; whisk to combine. Take the rub and sprinkle it all over the pork.
  • Add 1 tablespoon olive oil in a large skillet and set over medium heat; add pork and sear for a couple minutes on each side, or until golden brown.
  • In a blender or food processor combine remaining olive oil, balsamic vinegar, and garlic; process until combined and thickened. Add Italian seasoning and whirl for just a couple seconds to combine.
  • Add chicken broth to the insert of your slow cooker. Place pork loin, fat side up, in slow cooker. Using a pastry brush, brush the prepared balsamic mixture all over the pork loin. Cover slow cooker with a lid and cook on LOW for 4 to 5 hours, or on HIGH for 3 hours.
  • Check for doneness by inserting an instant read thermometer into the thickest part of the meat; pork is done when internal temperature reaches 145˚F.
  • Remove pork from slow cooker and transfer to a cutting board; cover pork with foil and let rest for 15 minutes before slicing. Slice and serve.
Hot Mama Grade: A

Hot Mama Notes: This recipe is amazing! Truly a delight! Flavorful and tasty! Such a great mix of flavors. I did 3ish hours on high. The internal temp was almost 200F. Not too much prep time for something so tasty. I made a half batch with 1.5 lbs of pork. 

Sunday, June 6, 2021

Chick Pea Salad

Recipe From: Paula & Brian 

Ingredients:
1/2 lb cooked chick peas (or 1 box). 
Finely diced red onion, about 1/2 cup. 
1 diced cucumber. 
1-2 diced tomato. 
Salt. 
1 tsp olive oil. 

That's it! Adjust to taste :)

Hot Mama Grade: A-

Hot Mama Notes: This salad is quick, easy, and tasty. I doubled the chick peas, cucumber (2 whole), and used half an onion.  No tomatoes initially, but added them later. I would make it again for a potluck or when hosting a dinner. I'm not sure my kids will love it. I think next year I would use a little less onion. I would also consider skipping the olive oil. 

Wednesday, May 5, 2021

Triple Chocolate Cake


Hot Mama Grade: A

Hot Mama Notes: This cake was very well received by all my bunko friends. They really liked it very much. I thought it was good, as well. Very rich.  I made the recipe as stated. I think next time I would use vanilla pudding. Another great variation would be to use peanut butter or butterscotch or mint chips! :) i made this cake as a bundt which required 41 minutes of baking. I served it with fresh whipping cream and garnished it with powdered sugar. 

Sunday, January 31, 2021

Party Pasta

Originally from: Taste & See, St. Andrew the Apostle Cookbook 

Hot Mama Grade: B 
Hot Mama Notes: This pasta was okay. It is kind of like a lasagna but with spiral noodles. I prefer regular lasagna better. I substituted 1/2 bar cream cheese and 1c sour cream for the ricotta as I did not have any. I also used chick pea, lentil, and while grain pasta. I used 1 lb sausage. I forgot the onion. I omitted the canned diced tomatoes and parsley, as I did not have any. 

Curried Turkey Meat Balls

Originally from: Frys Recipe Magazine 
Hot Mama Grade: B-
Hot Mama Notes: These meatballs are lackluster. I expected more flavor, but these are bland. I will not make them again.