Thursday, December 24, 2020

Gingerbread Cupcakes

From: https://foodwithfeeling.com/vegan-gingerbread-cupcakes

DRY INGREDIENTS:
1 ½ cups of all purpose flour
½ cup of dark brown sugar
1 teaspoon of baking soda
½ teaspoon of salt
½ tablespoon of cinnamon
½ tablespoon of ground ginger
½ teaspoon of all-spice
½ teaspoon of nutmeg
½ teaspoon of ground cloves

WET INGREDIENTS:
5 tablespoons of Country Crock Plant Butter, melted 
1 tablespoon of apple cider vinegar
⅓ cup of molasses
½ cup of plant based milk

FROSTING:
3 ½ cups of Powdered Sugar
1 cup (2 sticks) of Country Crock Plant Butter
1 tablespoon of Molasses
1/4 teaspoon of Ground Ginger
1 teaspoon of vanilla
½ tsp cinnamon
1 tablespoon of plant based milk

Instructions:

Pre-heat your oven to 350 degrees F. Line a cupcake tin with liners and spray the inside of the liners with cooking spray.
In a large bowl, whisk together the dry ingredients: flour, brown sugar, baking soda, salt and spices.

In a separate medium bowl, whisk together the wet ingredients: butter, apple cider vinegar, molasses, and plant based milk. Pour the wet ingredients into the bowl with the dry and mix until JUST combined. It’s important not to overmix this batter as it will add too much air into the cupcakes and cause them to sink.

Bake for 20-22 minutes or until a toothpick inserted in the middle of a cupcake comes out clean. Let cool before frosting.

To make the frosting, add the plant butter to the bowl of a stand mixer and, using the paddle attachment, whip the butter for 1 minute until light and fluffy. Add in the powdered sugar, slowly, until all of it is in. Finally, add in the molasses, vanilla, spices, and milk. Mix on medium-high for 2-3 minutes until nice and fluffy.

Hot Mama Grade: C-

Hot Mama Notes: This recipe is a DISASTER!! I will never make it again. The Gingerbread never baked sufficiently. The toothpick was never clean, even after double the baking time! I used mini cupcakes and even after 23 minutes on the oven, they were still wet-ish. I was scared to overbake them. And then they fell, so the cupcakes were sad and sunken. 

The only good thing is the frosting which is amazing. I used roughly half as much ginger and cinnamon so as to not make the flavor overpowering. The frosting is very tasty, though sweet. I would make it again! It is the only saving grace of this recipe. It made the cupcakes at least somewhat edible and covered up the sad sunken look. 

Also worth noting... The cupcakes stuck in their liner cups with spray oil or not. First pan I forgot the spray oil. They stuck. Second batch, I remembered the spray oil, and they still stuck. Lame.

I probably made too many substitutions, and maybe that is what ruined this recipe. I won't give it another try. I converted this vegan recipe to non vegan. I used butter and milk. I didn't think it would be an issue, but the Gingerbread turned out awful, so who knows. Next time I will search for and bake a non-vegan Gingerbread cupcake recipe. And maybe using mini cupcakes messed it up, but it shouldn't. 

Candied Nuts

From: https://smittenkitchen.com/2008/12/sugar-and-spice-candied-nuts/

Ingredients:
1/3 cup dark-brown sugar
2/3 cup white granulated sugar
1 teaspoon kosher salt (I might up this by a 1/2 tsp. next time for more of a sweet/salty balance)
Generous pinch of cayenne pepper (I swapped this with 1/4 teaspoon of hot smoked paprika)
1 teaspoon ground cinnamon
1 pound walnut or pecan halves or whole peeled hazelnuts
1 egg white, room temperature
1 tablespoon water

Directions:
Preheat oven to 300 degrees. Mix sugars, salt, cayenne, and cinnamon, making sure there are no lumps; set aside. Beat egg white and water until frothy but not stiff. Add walnuts, and stir to coat evenly. Sprinkle nuts with sugar mixture, and toss until evenly coated. Spread sugared nuts in a single layer on a cookie sheet fitted with parchment paper. Bake for 30 minutes, stirring occasionally. Remove from oven, and separate nuts as they cool. When completely cool, pour the nuts into a bowl, breaking up any that stick together.

Hot Mama Grade: A 

Hot Mama Notes: This recipe is true to form... Very easy and super delicious!! Yum. I will definitely make these again.  So tasty and addictive! I used regular paprika as I had no smoked paprika. I used pecans. 

Chocolate Peppermint Truffles

From: https://www.handletheheat.com/peppermint-oreo-truffle/#wprm-recipe-container-25987
 
Ingredients:
  • 39 (441 grams) regular Oreo cookies, don't remove cream filling
  • 8 ounces (227 grams) cream cheese, at room temperature
  • 3/4 teaspoon peppermint extract
  • 16 ounces (454 grams) semisweet chocolate, finely chopped
  • 1 tablespoon coconut oil or vegetable oil
  • 2 regular-size candy canes, finely crushed
Directions:

Place the Oreo cookies in the bowl of a food processor and pulse until finely ground. Add the cream cheese and peppermint extract and pulse until the mixture is well combined and smooth.
Line a rimmed baking sheet with parchment paper. Scoop the mixture into balls about 1-inch in diameter. I like to use a spring loaded cookie scoop.

Place the cookie balls in the freezer until well chilled, at least 1 hour or up to 1 day.
When cookie balls are chilled, combine the chopped chocolate and oil in a medium microwave-safe bowl. Microwave in 30 second bursts, stirring between bursts, until just melted and smooth. Do not overheat.
Drop each cookie ball into melted chocolate, coating evenly. Remove with a fork, gently tapping off excess chocolate. Place back on cookie sheet and immediately sprinkle with the crushed candy canes. Repeat with the remaining cookie balls. Reheat the chocolate as needed so it remains pourable.
Refrigerate until set before serving. Store the truffles in an airtight container in the fridge for up to 15 days.

Hot Mama Grade: A 

Hot Mama Notes: I don't have a food processor, so this recipe was a bit more annoying to make than it should have been. I should have ground the oreos down 10 at a time in my blender, and then combined the oreos with the cream cheese in my mixer. Instead, I tried to do everything in the blender which was a mistake. It didn't work, and I had to pull everything out. Annoying. Also annoying, chopping bars of chocolate finely which then go everywhere due to static electricity. Messy. I started putting a clean paper towel over the chopped chocolate so it would not go everywhere while I poured it into the bowl from the cutting board. The candy cane I needed to leave more in coarse pieces. Despite all this, the truffles are super delicious, and I will definitely make them again! 😍❤️❤️😋 I think my issue when I made these is that I was already super tired from baking 6 other cookie recipes before doing this one! :O Christmas baking overload!

Friday, December 11, 2020

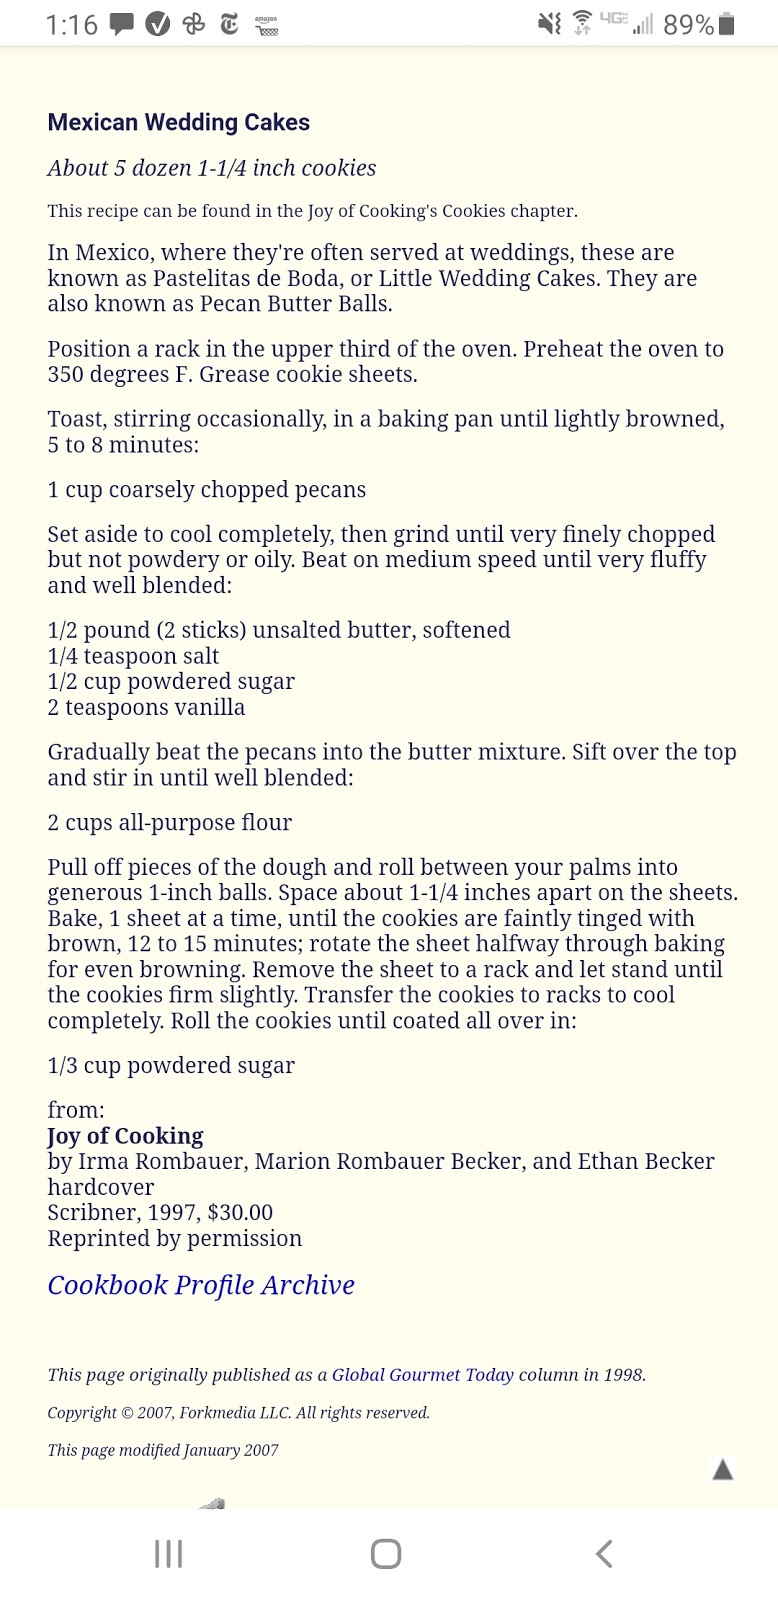
Mexican Wedding Cake Cookies (Pecan Balls)

Posted at : https://www.foodwine.com/ggt/ggt0498/ggt042498.html

Hot Mama Grade: A
Hot Mama Notes: These are excellent cookies! Very tasty and not too hard to make. I used the manual chopper to chop the pecans. :) 

Chocolate Buttercream Frosting

Posted at: https://www.allrecipes.com/recipe/26019/creamy-chocolate-frosting/?internalSource=hub%20recipe&referringContentType=Search


Ingredients:
  • 6 T Cocoa Powder
  • 6 T Butter
  • 5 T evaporated milk
  • 1 t vanilla
Directions:
Cream butter. Add dry ingredients and milk. Blend in vanilla. Beat until fluffy. If needed, adjust consistency with milk or sugar. 

Hot Mama Grade: A 
Hot Mama Notes: This frosting is amazing and easy! My kids loved it! I will definitely make it again! 

Saturday, November 7, 2020

Korean Beef Bowls

Posted by: https://damndelicious.net/2013/07/07/korean-beef-bowl/

INGREDIENTS:
1/4 cup brown sugar, packed
1/4 cup reduced sodium soy sauce
2 teaspoons sesame oil
1/2 teaspoon crushed red-pepper flakes, or more to taste
1/4 teaspoon ground ginger
1 tablespoon vegetable oil
3 cloves garlic, minced
1 pound ground beef
2 green onions, thinly sliced
1/4 teaspoon sesame seeds

DIRECTIONS:
In a small bowl, whisk together brown sugar, soy sauce, sesame oil, red pepper flakes and ginger.
Heat vegetable oil in a large skillet over medium high heat. Add garlic and cook, stirring constantly, until fragrant, about 1 minute. Add ground beef and cook until browned, about 3-5 minutes, making sure to crumble the beef as it cooks; drain excess fat.
Stir in soy sauce mixture and green onions until well combined, allowing to simmer until heated through, about 2 minutes.
Serve immediately, garnished with green onion and sesame seeds, if desired.

Hot Mama Grade: C

Hot Mama Notes: I was disappointed by this recipe. I really thought I was going to love it. It came highly recommended by a friend. And it is simple, quick, and easy which is a must for any dinner recipe that is a keeper. As a working mom, I can't spend 3 hours cooking dinner. But, it needs to be good, too. And this was blah. I ate mine, but didn't love it. Two of my kids refused to finish theirs after a few bites. :(. And I had a hard time using up the leftovers. I think the sauce was reasonable, if a bit too sweet for my liking. But I didn't like the ground beef. I think it would have been better with stew beef, however I won't be making it again to try that out! :/. Boo. 

Monday, October 12, 2020

Mostaccioli

Posted at:
https://www.smalltownwoman.com/baked-mostaccioli/#tasty-recipes-21951

INGREDIENTS
1 lb box mostaccioli
1 lb bulk Italian sausage
1 large green pepper seeded, veined and chopped
1 medium onion chopped
4 garlic cloves minced
4–5 cups marinara
1 1/2 cups provel ropes or provolone shredded
1 1/2 cups mozzarella shredded
1/2 cup parmesan
Salt and pepper

INSTRUCTIONS
Cook mostaccioli following box instructions and drain well.
Brown sausage in skillet on medium heat. Remove sausage to plate; cover and keep warm.
Add peppers and onions to same skillet over medium high heat. Cook 3-5 minutes or until edges of onions start to brown. Add garlic and cook 1 additional minute. Remove from heat.
Combine the cooked sausage mixture, cooked mostacccioli, and marinara in a large casserole dish. Salt and pepper to taste. Sprinkle with provel, mozzarella and parmesan.
Bake at 350 degrees for 25-30 minutes or until cheese is melted and started to brown just a touch.

Hot Mama Grade: A 

Hot Mama Notes: I used penne pasta. I didn't have much parmesan cheese, but I used shredded mozzarella and 6 slices of provolone. I used 2lbs of ground turkey, but I think next time I would use 1 lb sausage and 1 lb turkey. I used a jar of spaghetti sauce. I didn't have a green pepper, but I did use an onion and 3 cloves of minced garlic. 

Crumbl Cookies

Posted at:
 https://letsdishrecipes.com/copycat-crumbl-chocolate-chip-cookies/
Hot Mama Grade: B+

Hot Mama Notes: These cookies take way longer than 10 minutes to cook. The cookies are very sweet. I don't think they taste like crumbl cookies, but I like them anyway.

Sunday, October 11, 2020

Lime Custard Tart

From Moosewood Dessert Cookbook
Hot Mama Grade: A 
Hot Mama Notes: I substituted sour cream for plain yogurt as I didn't have any. This tart is delicious! :) I would make it again. Yum. The kids don't love it as much as I do. Maybe that is a good thing, ha! I used a 10 inch removable-bottom tart pan, and still the filling overflowed a bit. 

Thursday, October 8, 2020

Simple Indian Curry

Posted on: 
https://www.allrecipes.com/recipe/46822/indian-chicken-curry-ii/

Ingredients:
Directions:
1. Heat olive oil in a skillet over medium heat. Saute onion until lightly browned. Stir in garlic, curry powder, cinnamon, paprika, bay leaf, ginger, sugar and salt. Continue stirring for 2 minutes. Add chicken pieces, tomato paste, yogurt, and coconut milk. Bring to a boil, reduce heat, and simmer for 20 to 25 minutes.
2. Remove bay leaf, and stir in lemon juice and cayenne pepper. Simmer 5 more minutes.

Notes from reviews:
1. Add 1t garam masala, omit lemon juice, double all dry ingredients 
2.
Hot Mama Grade: A
Hot Mama Notes: This curry was tasty. Still a lot of cooking, but worth it, I think. I followed the review to use vegetable oil and cook the spices first as I learned that from my Indian friend. I doubled the dry ingredients, omitted the lemon juice and Chile powder. I kept sugar as single measure. I used 3 garlic cloves, 1T concentrated tomato paste from a refrigerated tube. I used the full can of unsweetened coconut milk plus 1/2 c of sour cream in lieu of plain yogurt, as I had none. I cooked the spices (and used a ton of oil!), then added onions and garlic. Then tomato paste, coconut milk, sour cream. Shortly after that I added the chicken and potatoes. The potatoes resulted in a longer cooking time, as expected. About double, 45 to 50 minutes for tender potatoes. 

Monday, September 21, 2020

Disappearing Brownies

From United Methodist Cookbook

Hot Mama Grade: B+

Hot Mama Notes: This Brownies were very sweet and ooey gooey. I don't think I would make them again. The center is very wet. It mentions that in the recipe, so I didn't want to overbake. I did bake 25 minutes or so. They solidified some in the center upon cooling, but were still very wet. It was a small pan, so the kids and I ate them all! 😁😂🤣 No more leftovers to worry about. The edge pieces were best. Yum, butterscotch! I used milk chocolate instead of semisweet chips which likely contributed to the sweetness and richness. 

Saturday, September 19, 2020

Slow Cooker Brisket

Posted by: https://www.recipetineats.com/slow-cooker-beef-brisket-with-bbq-sauce/

Ingredients

  • 1.5 – 2 kg / 3 – 4 lb beef brisket (Note 1)
  • 1 tbsp olive oil (or a neutral oil like vegetable, canola)

RUB:

  • 1 tbsp brown sugar
  • 2 tsp paprika powder
  • 1 tsp onion powder
  • 1 tsp garlic powder
  • 1/2 tsp cumin powder
  • 3/4 tsp mustard powder
  • 1 tsp salt
  • 1/2 tsp black pepper

BBQ SAUCE:

  • 2 garlic cloves , minced
  • 1/2 cup / 125 ml apple cider vinegar
  • 1 1/2 cups / 375 ml ketchup
  • 1/2 cup / 110g brown sugar , packed
  • 2 tsp EACH black pepper, onion powder, mustard powder
  • 1 tsp cayenne pepper (adjust to taste re: spiciness)
  • 1 tbsp Worcestershire sauce
Instructions
Mix Rub ingredients. Rub all over brisket. If time permits, leave for 30 minutes – 24 hours in the fridge, but I rarely do this.
Combine BBQ Sauce ingredients in a slow cooker. Mix then add the brisket – squish it in if needed, like I did (see video).
Slow cook in slow cooker for 8 hours (1.5 kg / 3 lb) to 10 hours (2 kg / 4 lb). (Note 2 for pressure cooker and click here for oven)
Remove brisket onto a tray.
Pour liquid in slow cooker into a saucepan. Bring to simmer over medium high heat and reduce until it thickens to a syrup consistency (it thickens more as it cools).
Meanwhile, drizzle brisket with oil then roast in a 200C/390F oven for 15 minutes until brown spots appear. Remove then baste generously with Sauce, then return to oven for 5 minutes. Remove and baste again, then return to oven for 5 – 10 minutes until it caramelises and looks like the photos. (See note for BBQ option)
TO SERVE: Slice brisket thinly across the grain and serve with remaining BBQ Sauce. This is terrific served as a meal with sides or piled high onto rolls with Coleslaw as sliders. See Note 3 for more ideas

Notes:
1. Beef - This recipe will work on any slow cooking cut of beef but it works best with brisket because it holds its shape once slow cooked until tender, so it can be sliced. See post for more info. Best sub is chuck beef roast that's rolled and tied. 
2a). Cook time - The cook times provided yields a tender brisket that is sliceable but tender so the slices tear easily, as demonstrated in the video. Don’t stress too much about cook time - brisket is a cut of beef that holds together pretty well even cooked to the point of being shreddable. So even a 1.5kg / 3 lb brisket slow cooked for 10 hours should still be sliceable. Brisket that isn’t tender is tough and chewy but if you pull it out too early, don’t worry, just keep cooking!
SLOW COOKER on HIGH: Same recipe, 4.5 hours for 1.5 kg / 3 lb or 5 hours for 2 kg / 4 lb. Follow same directions.
PRESSURE COOKER: Same recipe, 1 hr 15 minutes for 1.5 kg / 3 lb or 1 hr 30 minutes for 2 kg / 4 lb. Follow same directions. If you've got an Instant Pot, add 1 cup water (otherwise you get the burn notice) and might need to reduce sauce slightly at end. Natural release, or wait 15 minutes then quick release
OVEN: Click here for directions.
2b) DIFFERENT SIZES: For a 800g - 1 kg / 1.6 - 2 lb piece of brisket, I would still slow cook for 7 to 8 hours on low because the cook time is more about brisket width rather than length. 
For a 2.5 - 3 kg / 5 - 6 lb brisket, I would slow cook for 10 hours on low.
3. How to serve - See in post for what to serve this with. For Sliders, I use soft rolls (brioche buns are pictured in the post) with Coleslaw (or try this No Mayo Coleslaw - it's excellent!)
4. Finish on BBQ: fantastic chargrilled flavour: Brush grills with oil, then preheat BBQ to medium. Place beef on the grills and leave until browned, then turn the beef over and brown the other side. Baste the beef generously and turn, then baste again. Do this repeatedly until there is a nice caramelised glaze on the brisket, then remove.

Hot Mama Grade: Meat - A, BBQ Sauce - F

Hot Mama Notes: The meat turned out good, but I would never make the BBQ sauce again. It tasted too much like ketchup. Yuck! I also wouldn't bother with baking at the end. Just put it in the show cooler and then eat! :)

6 Minute Chocolate Cake (Wacky Cake)

From: Moosewood Dessert Cookbook
Hot Mama Grade: A 

Hot Mama Notes: Everyone enjoyed this cake. I didn't frost it (because I didn't want to make frosting when I was already making 4 separate desserts for a dessert party), but I think next time I would frost it and it would taste even better. A friend mentioned that this cake originated in the great depression when eggs were scarce, and that it is called Wacky cake. The cake is moist and has good flavor.

Cowboy Cookies

From: Moosewood Dessert Cookbook 

Hot Mama Grade: A 

Hot Mama Cookies: These cookies are good. I would make them again. They are easy and relatively quick to make. This recipe doesn't make a ton of cookies. I would make a double batch next time. 

Pumpkin Scones

Originally posted by: https://www.gimmesomeoven.com/pumpkin-scones/?utm_campaign=later-linkinbio-gimmesomeoven&utm_content=later-10223517&utm_medium=social&utm_source=instagram#tasty-recipes-73924


PUMPKIN SCONE INGREDIENTS:
2 1/2 cups all-purpose flour
1/2 cup packed brown sugar
1 tablespoon baking powder
2 teaspoons ground cinnamon
2 teaspoons pumpkin pie spice
1/2 teaspoon fine sea salt
1/2 cup very cold salted butter,* diced or grated (or +1/4 t salt) 
3/4 cup pumpkin purée
1/3 cup buttermilk (or milk), plus extra for brushing
1 teaspoon vanilla extract

VANILLA GLAZE INGREDIENTS:
1/2 cup powdered sugar
2 to 3 teaspoons buttermilk (or milk)
1/2 teaspoon vanilla extract
optional: 1/4 teaspoon ground cinnamon, ginger or cardamom

INSTRUCTIONS
Combine dry ingredients. In a large mixing bowl, whisk together flour, brown sugar, baking powder, cinnamon, pumpkin pie spice and salt until evenly combined.

Cut in the butter. Add the diced butter and use a pastry cutter or two forks (or a food processor, see below) to cut the butter evenly into the dry ingredients until the mixture is crumbly and the butter forms no larger than pea-sized chunks.

Add in the wet ingredients. Add in the pumpkin purée, milk and vanilla extract. Then use a spatula to quickly and gently stir the mixture until no dry streaks remain. (Try to avoid over-mixing.)

Shape the scones. Turn the mixture out onto a flour-dusted surface and fold the dough over on itself a few times until it holds together and can form a ball. (The dough will be a bit sticky, so don’t worry.) Pat the dough down flat into an 8-inch circle. Then use a large knife or bench scraper to slice the dough into 8 equal-sized pie wedges. (You may need to wipe off your knife between slices if the dough is sticky.)

Chill. Transfer the wedges to a parchment-covered baking sheet, spacing them at least 2 inches apart. Then transfer the baking sheet to the freezer for 15 minutes or so while your oven heats. Heat the oven to 425°F.

Bake. Briefly brush the top of each scone with a bit of buttermilk. Then transfer the baking sheet to the oven and bake for 13-15 minutes or until the scones are lightly golden on top and cooked through. Transfer to a wire baking rack to cool.

Glaze. In a small bowl, whisk together the glaze ingredients until combined. (If the mixture seems too thin, add more powdered sugar.) Then once the scones have cooled a bit, brush or drizzle the glaze on top of the scones. Serve and enjoy!

NOTES
Butter: If you are using unsalted butter, just add an extra 1/4 teaspoon salt to the recipe. Also, it’s important that your butter is completely chilled, so I recommend keeping it in the fridge right up until the minute that you add it to the recipe.

POSSIBLE VARIATIONS:
Want to customize this pumpkin scone recipe a bit? Feel free to…

Sprinkle some turbinado sugar on top: In lieu of (or in addition to) a glaze, I also made a batch of these sprinkled with chunky turbinado sugar on top before baking and they were delicious. Highly recommend if you would like a bit of extra crunch and sweetness.

Add baking chips: You could also mix some semisweet or white chocolate chips into the scone dough if you would like.
Add nuts: You could also mix in some chopped nuts (such as pecans or walnuts) into the scone dough, or sprinkle some on top of the glaze.

Use different warming spices: Feel free to also play around with the types and amounts of warming spices added to this recipe. For example, some ground cardamom would be delicious in these scones too.

Hot Mama Grade: B+

Hot Mama Notes: I had to bake these an extra 2-3 minutes than listed. I used a toothpick coming out clean as the gauge. These scones are good but very rich!! And I think I prefer turbinado sugar on top to glaze, but the glaze is sweet and tasty (just very sticky and wet).  You need to eat the scones with a fork with the glaze. I like these, but I'm not a pumpkin fiend as much as some others, so I think I like plain chocolate chip scones better.  That being said, I would make them again! :)


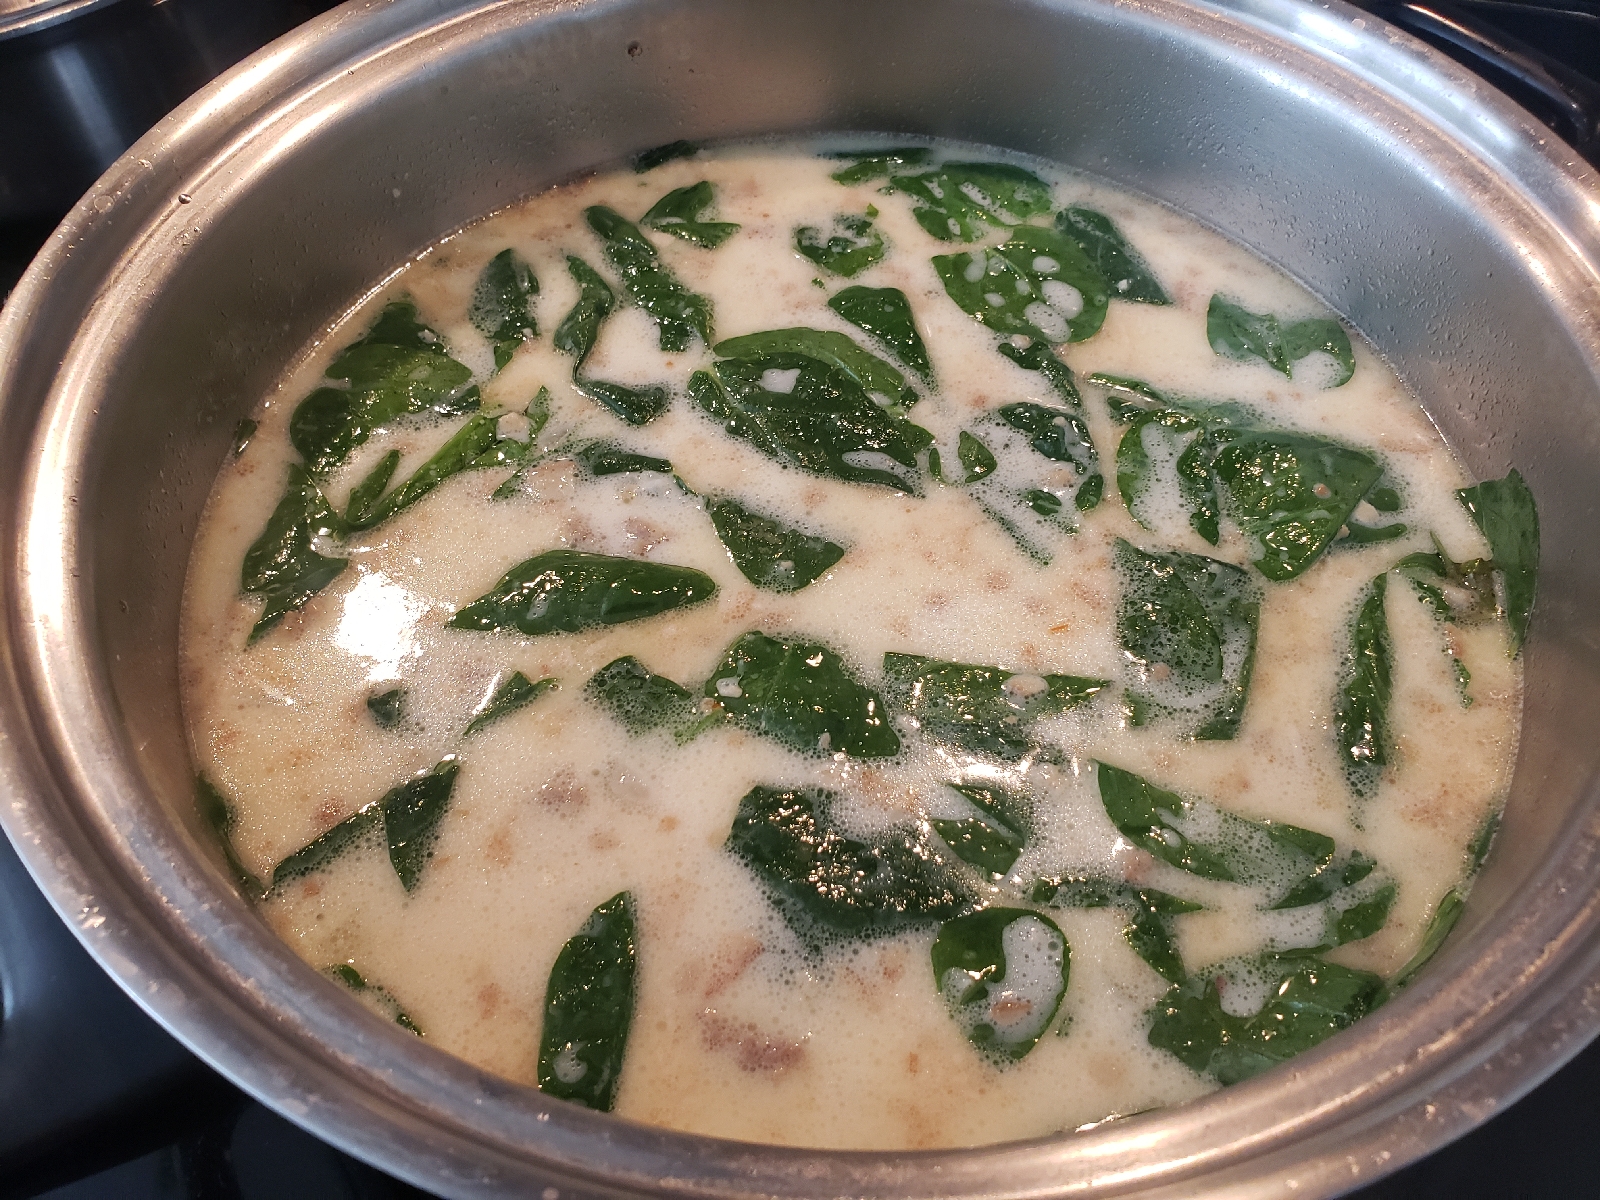
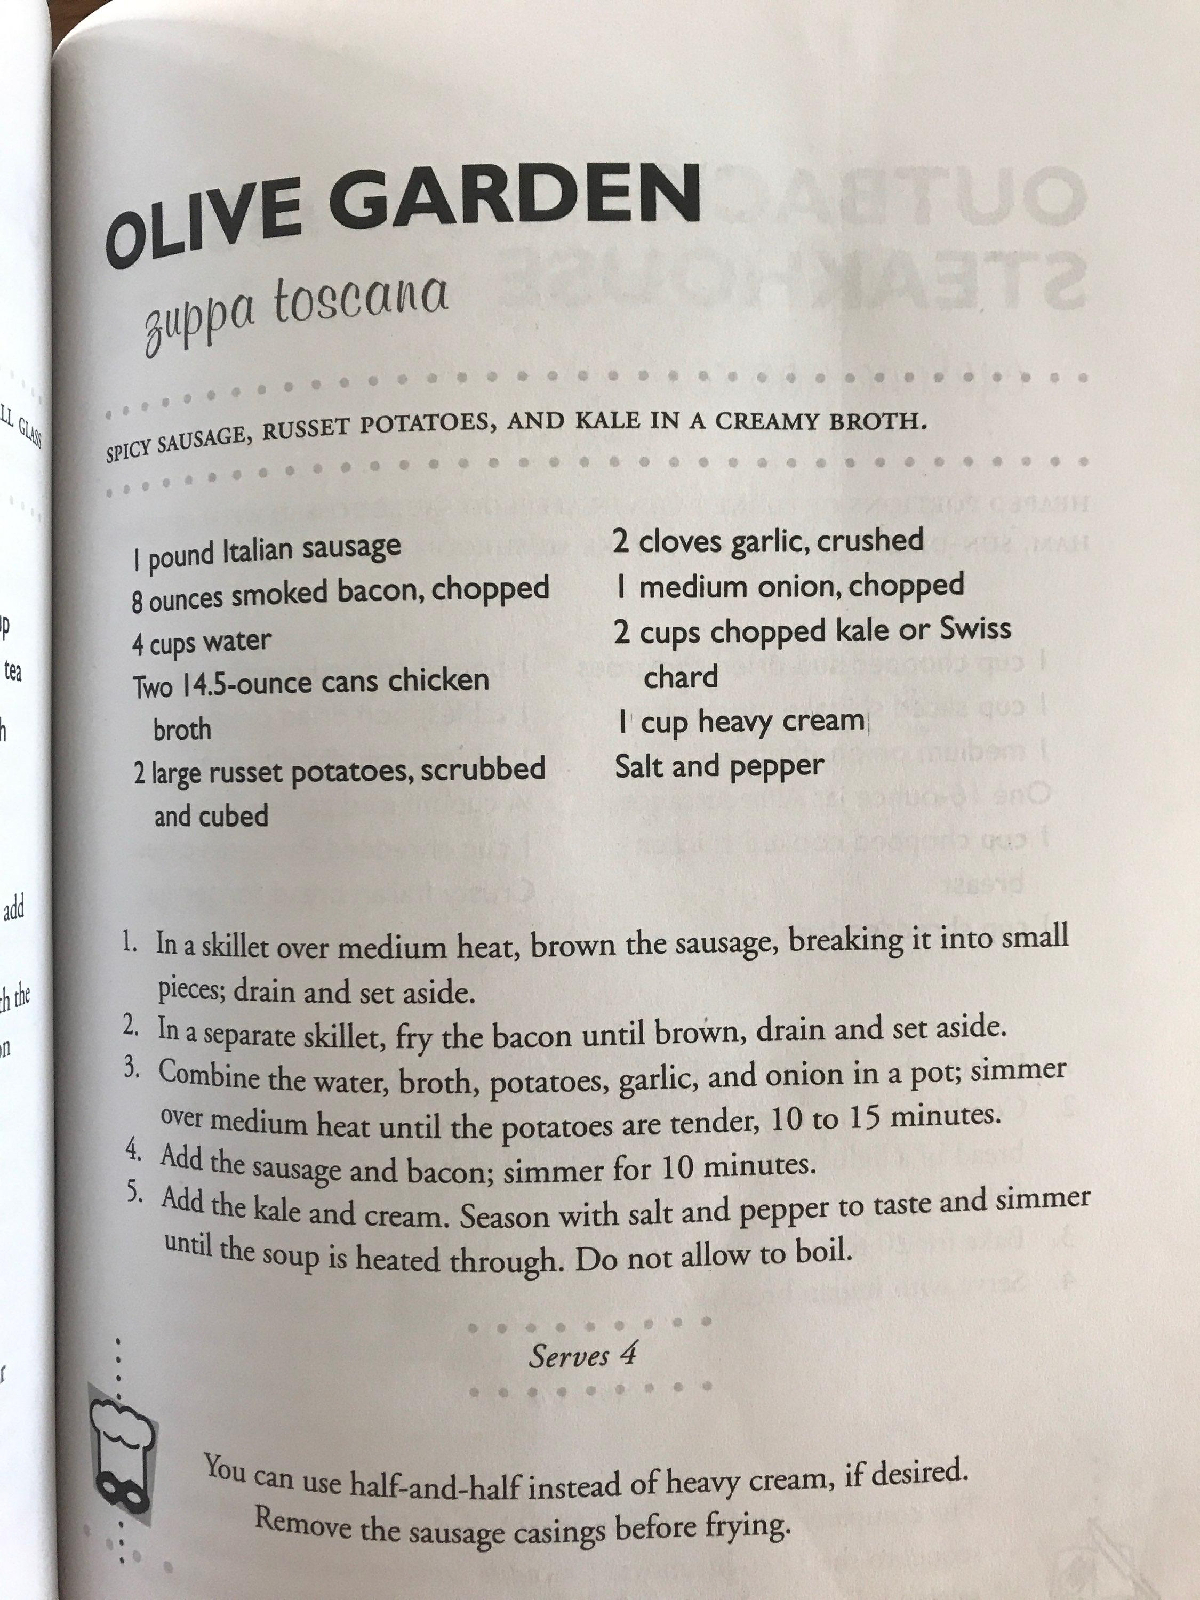
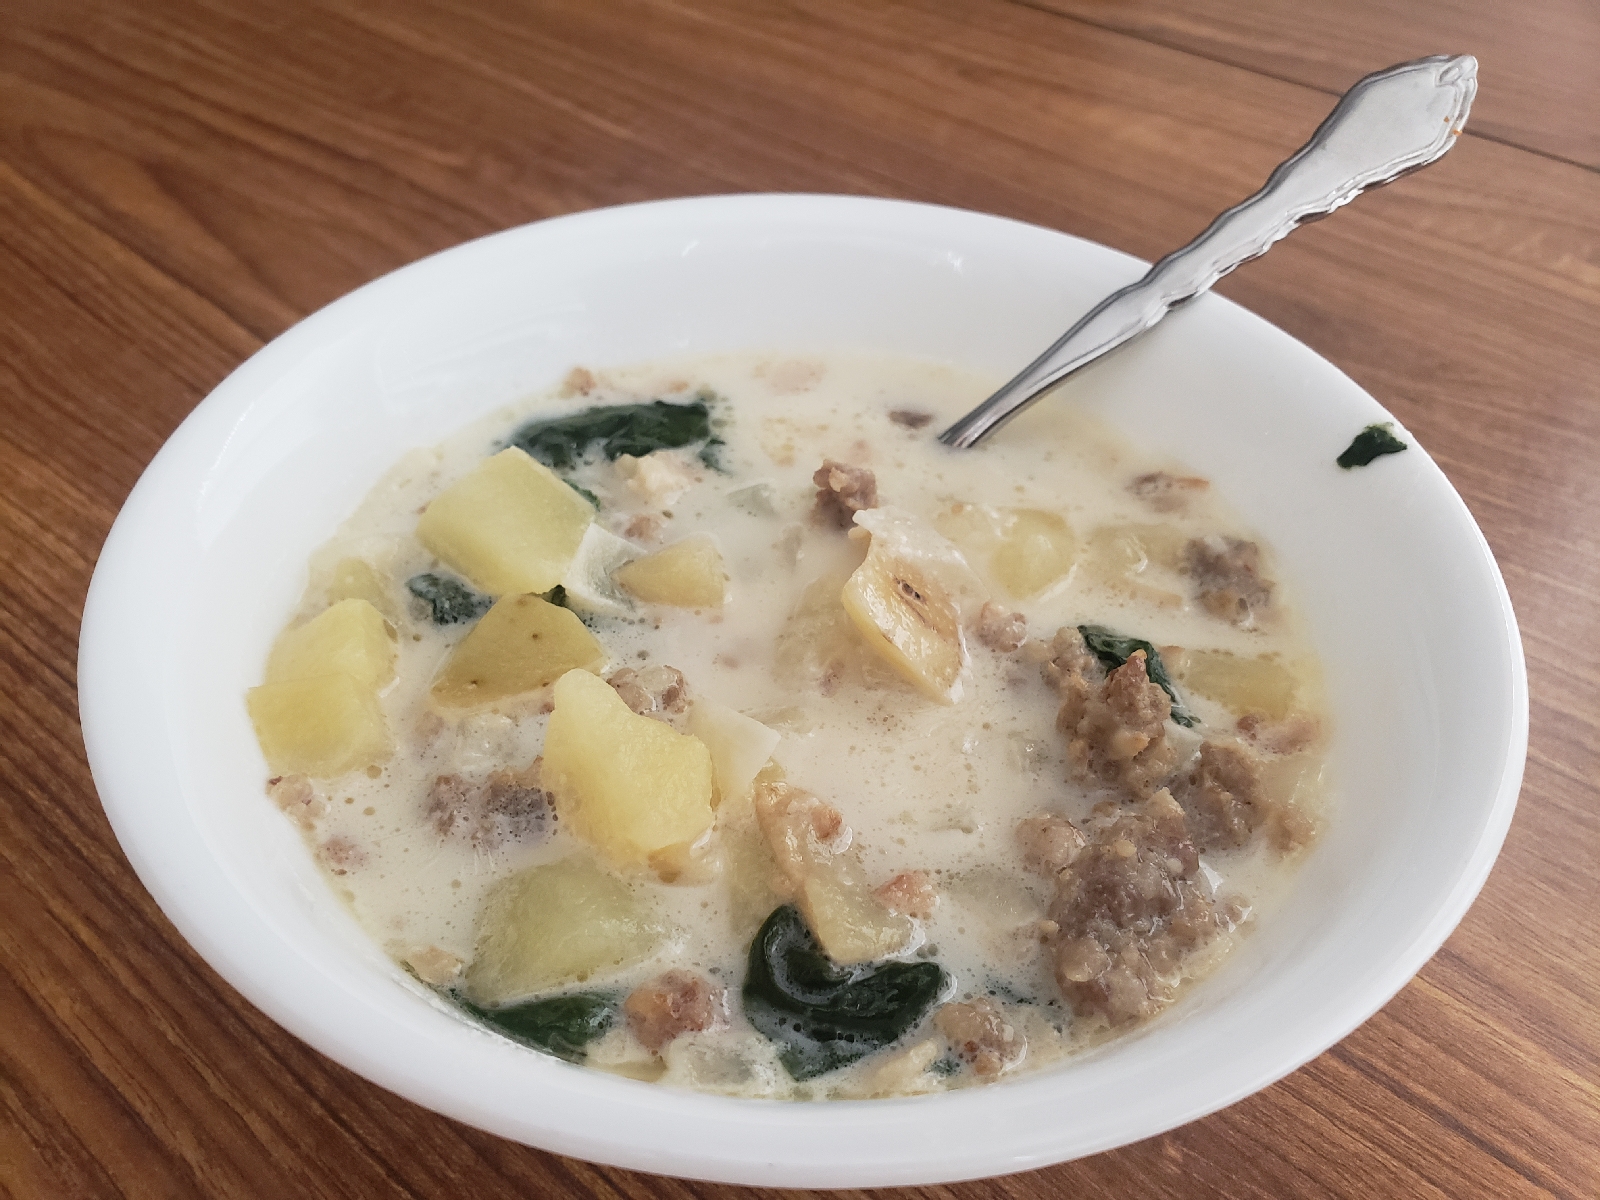
Zuppa Toscana

Hot Mama Grade: A

Hot Mama Notes: I like this soup. It is an annual favorite at our Bunko Christmas party. This is my first time making it; I asked for the recipe. It's a little more work than I like to do...  Lots of pots and pans. Usually my soups are simple! It is tasty though. And easy enough. 

Monday, September 7, 2020

Chocolate Sugar Cookies


Hot Mama Grade: B+
Hot Mama Notes: Th

Ribeye Steak - Cast Iron

3 min each side on high heat in the cast iron pan, 5 min in oven at 400 to make medium instead of medium rare. Put butter on top steak, plus rosemary (whole) and a garlic choice crushed without skin.  Dry off meat before cooking. Also season with salt and pepper. 

Hazelnut Brownies

From: Moosewood Dessert Cookbook 

Hot Mama Grade: C
Hot Mama Notes: I have to say that I am mightily disappointed by this recipe. I love chocolate. I love hazelnuts. I love chocolate and hazelnuts together. But this recipe was a lot of work (which I didn't mind), but it didn't deliver. :(. It was very dense. A bit too much dark chocolate for me. The roasted hazelnuts were delicious. And they ground up nicely in my blendtec. I wasn't sure they would. And the trick with rubbing the nuts on the towel to get the skins off worked like a charm. I will not make this again. It didn't really taste like Brownies, but rather like a chocolate bar or almost fudge. 

Maple Cake

From: Moosewood Dessert Cookbook 
Hot Mama Grade: B+

Hot Mama Notes: This is a good cake. And I really like maple. I'm not sure exactly what I was expecting. Maybe something smoother, lighter, fluffier. This is a heavy and moist cake. The frosting is very sweet, but good. The recipe was easy and easy to follow. I had all the ingredients on hand. I didn't add the extra maple flavor because I forgot. I wish I would have, though. The cruising recipe makes just enough. I had to cook the cakes in the frig because it's so hot here. I kept the frosting in the frig as well, until the cake was ready to frost.